
Before and After: Hutch Makeover (Part 1)
 Now I don’t say this lightly, but get ready for one of my favorite projects of all time! I don’t typically take on such large projects, but I’ve wanted to decorate our new place on a budget and with a bit more character (that’s where DIY comes in perfectly).
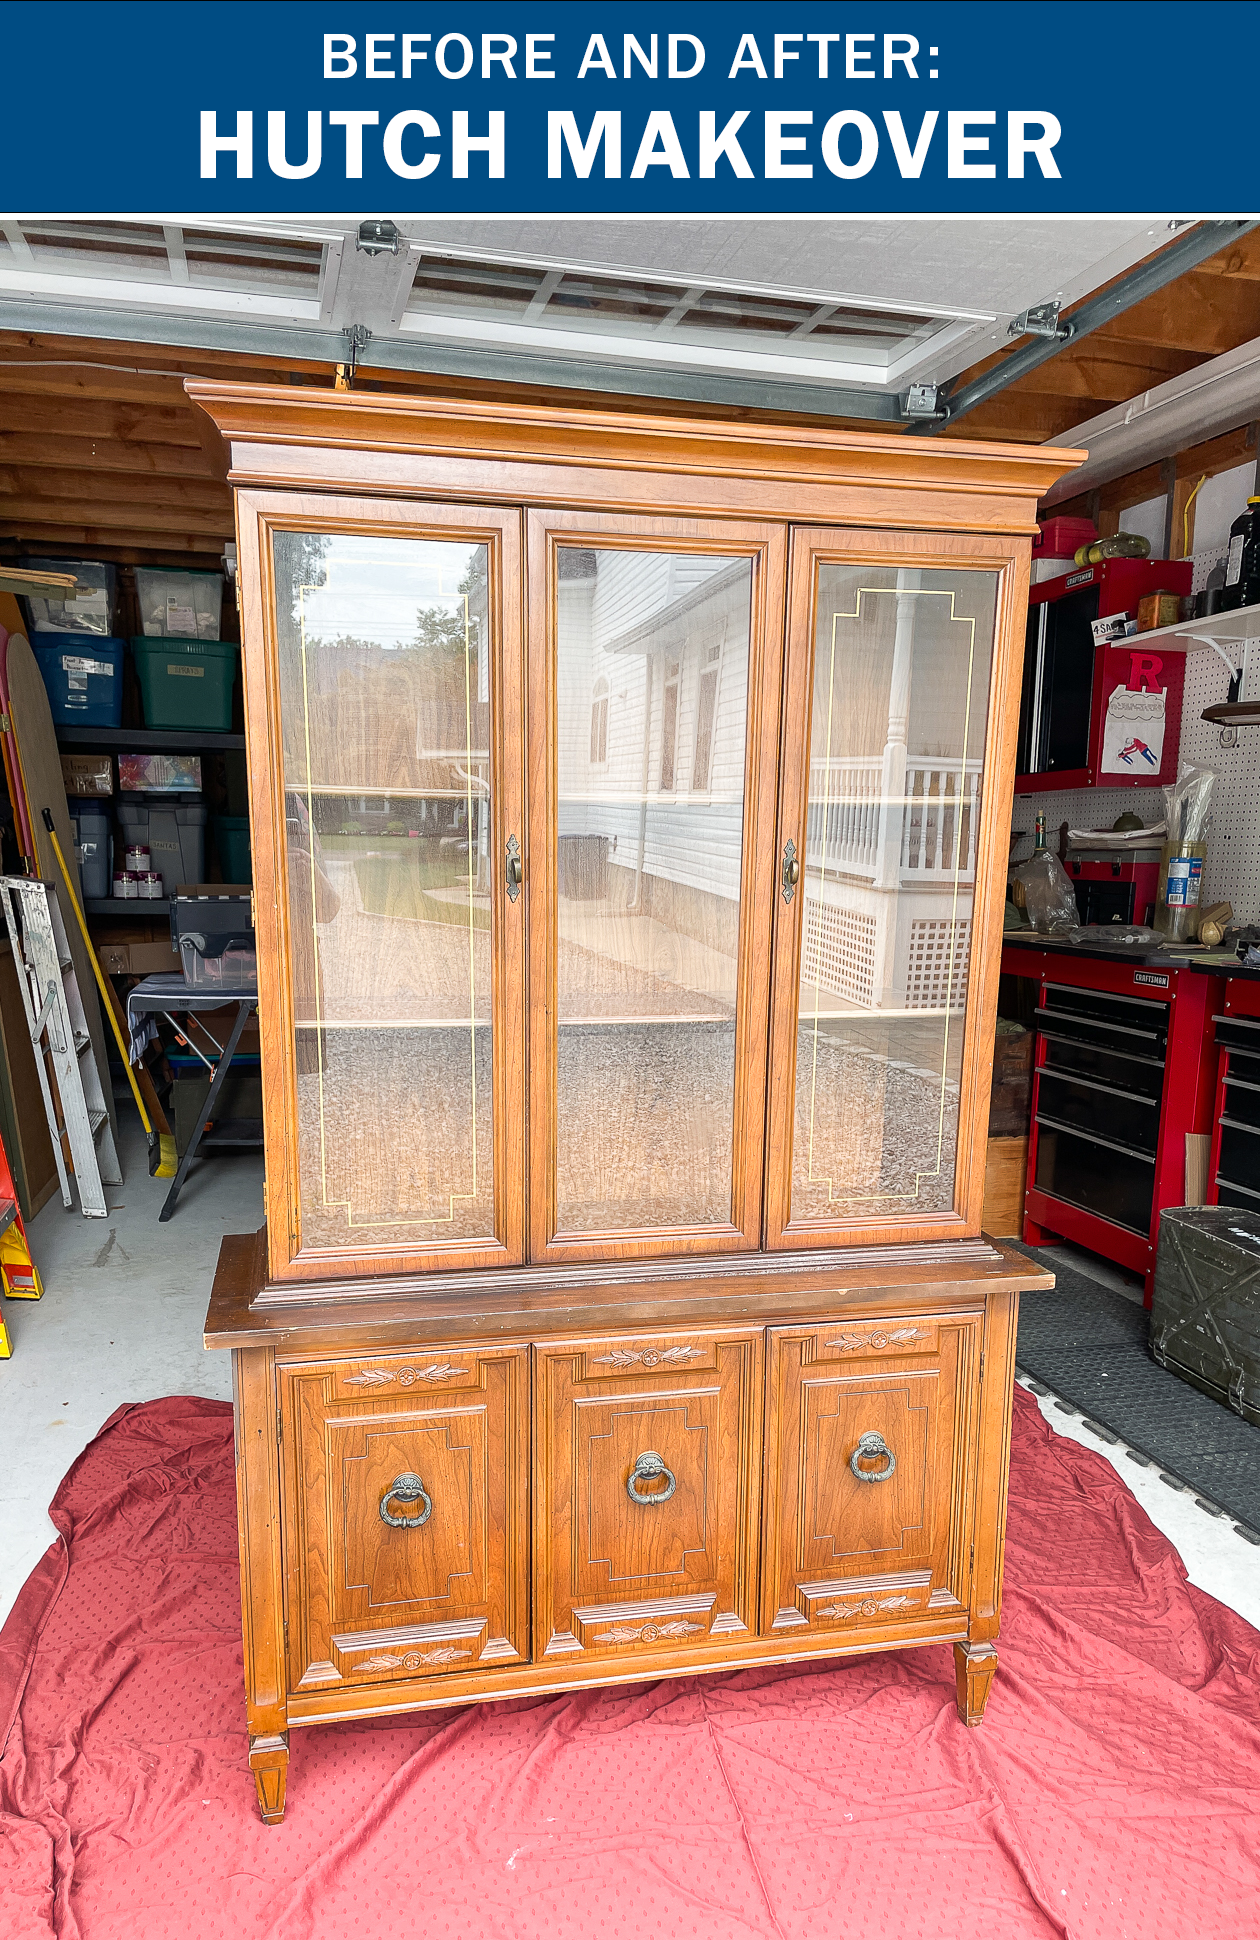
I’ve worked on this behind the scenes now for almost two months and the hutch makeover is finally done. There’s so much to say that this project will be split into two parts (today and tomorrow). For today’s post– here’s more about the hutch before it got a colorful makeover!
The Before
The kitchen in our new apartment is much smaller than our old one, so I’ve been looking for an extra storage option since we moved in. I love the idea of having dishes and glassware on display instead of tucked away, so a hutch was the perfect solution! Ryan and I kept checking thrift stores week after week, but couldn’t find the exact size we needed. Seriously if you want to do a hutch makeover yourself, check your local thrift store. We saw so many beautiful pieces come and go throughout our search.
We finally found one on Facebook Marketplace (thanks to the help from his mom!) and it was FREE!! A price tag that was definitely worth the wait!
 When looking for a piece, we really wanted something that we would feel fine painting i.e not quality wood or a valuable antique. Not only was this hutch in someones garage for years, it also isn’t solid wood. Really it feels like vintage Ikea in a way, making it the perfect canvas for a colorful paint job.
The Prep
 The prep, omg the prep. This was definitely the most time consuming part of the project, but a completely necessary step. Don’t take on any furniture project with the intentions of skipping prep work, because it will bite you in the ass later on. Trust me, I’ve learned this tip through several failed projects. It’s worth the time and patience!
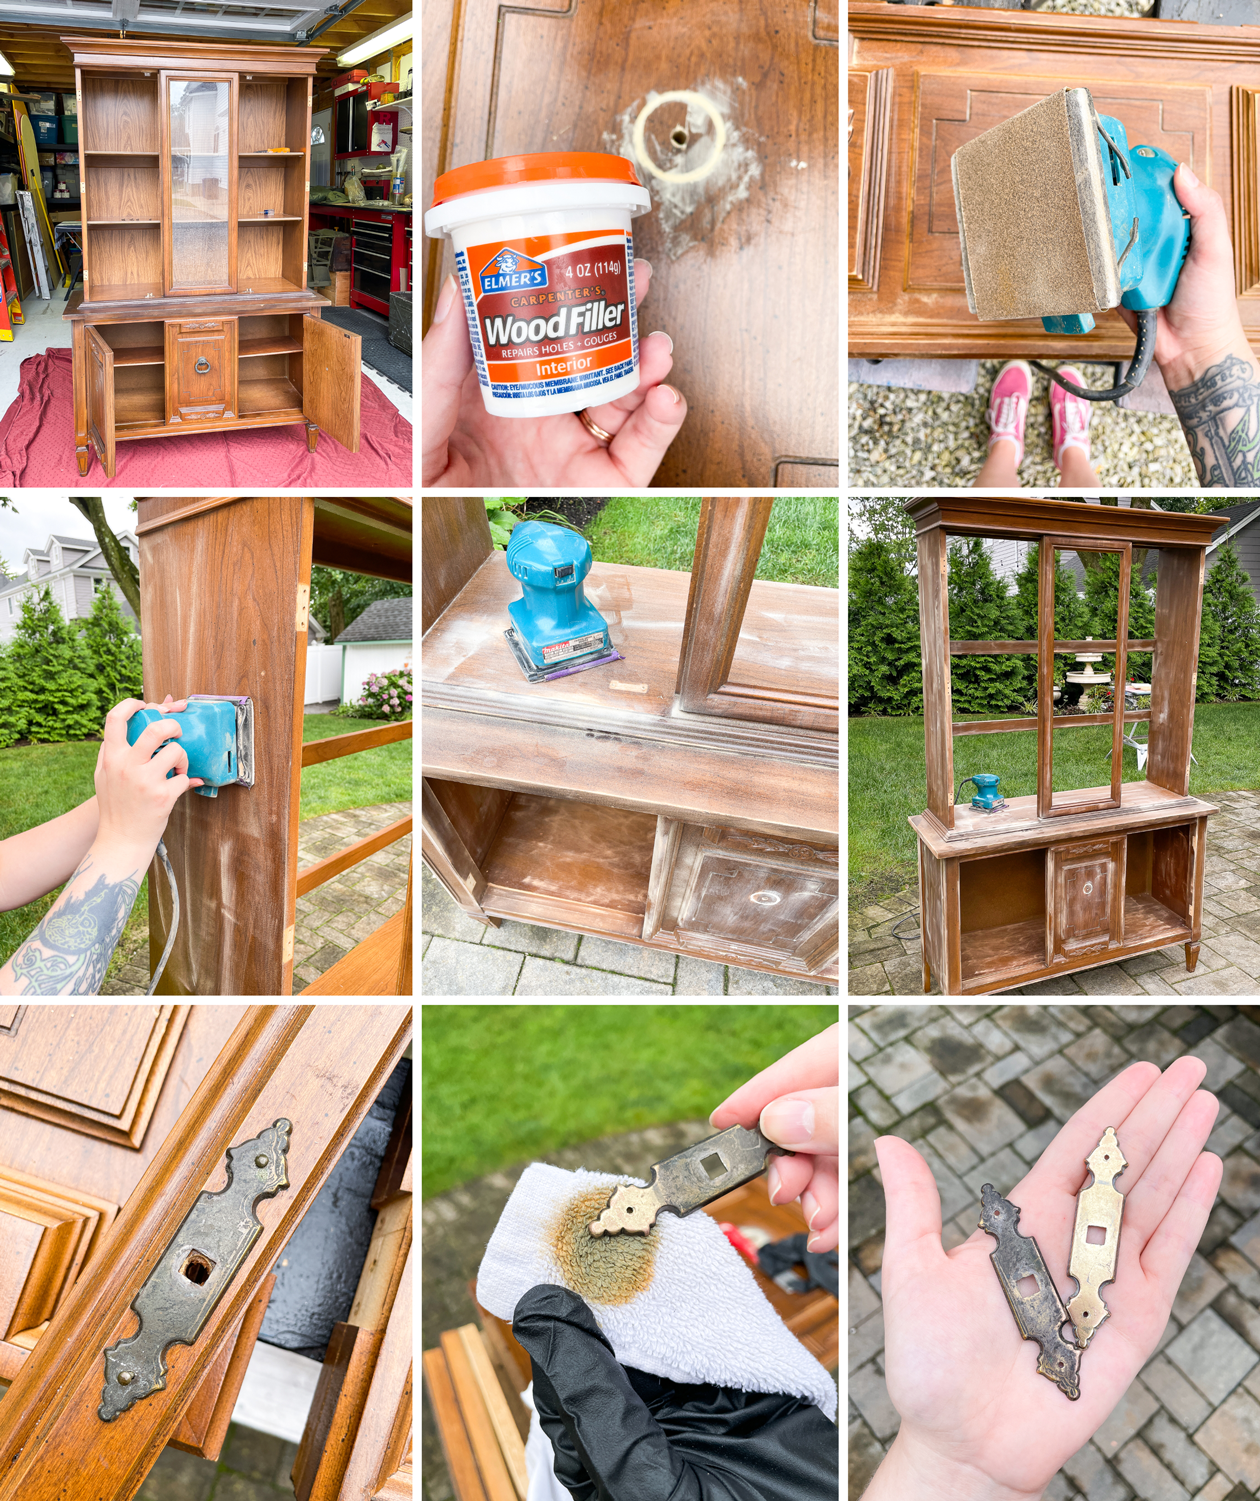
I started off with the basics: removing the doors, the glass, the back panel and the shelves. Everything needed to be cleaned since it was sitting neglected for years. Yes there were spider eggs all underneath and yes I made Ryan clean that.
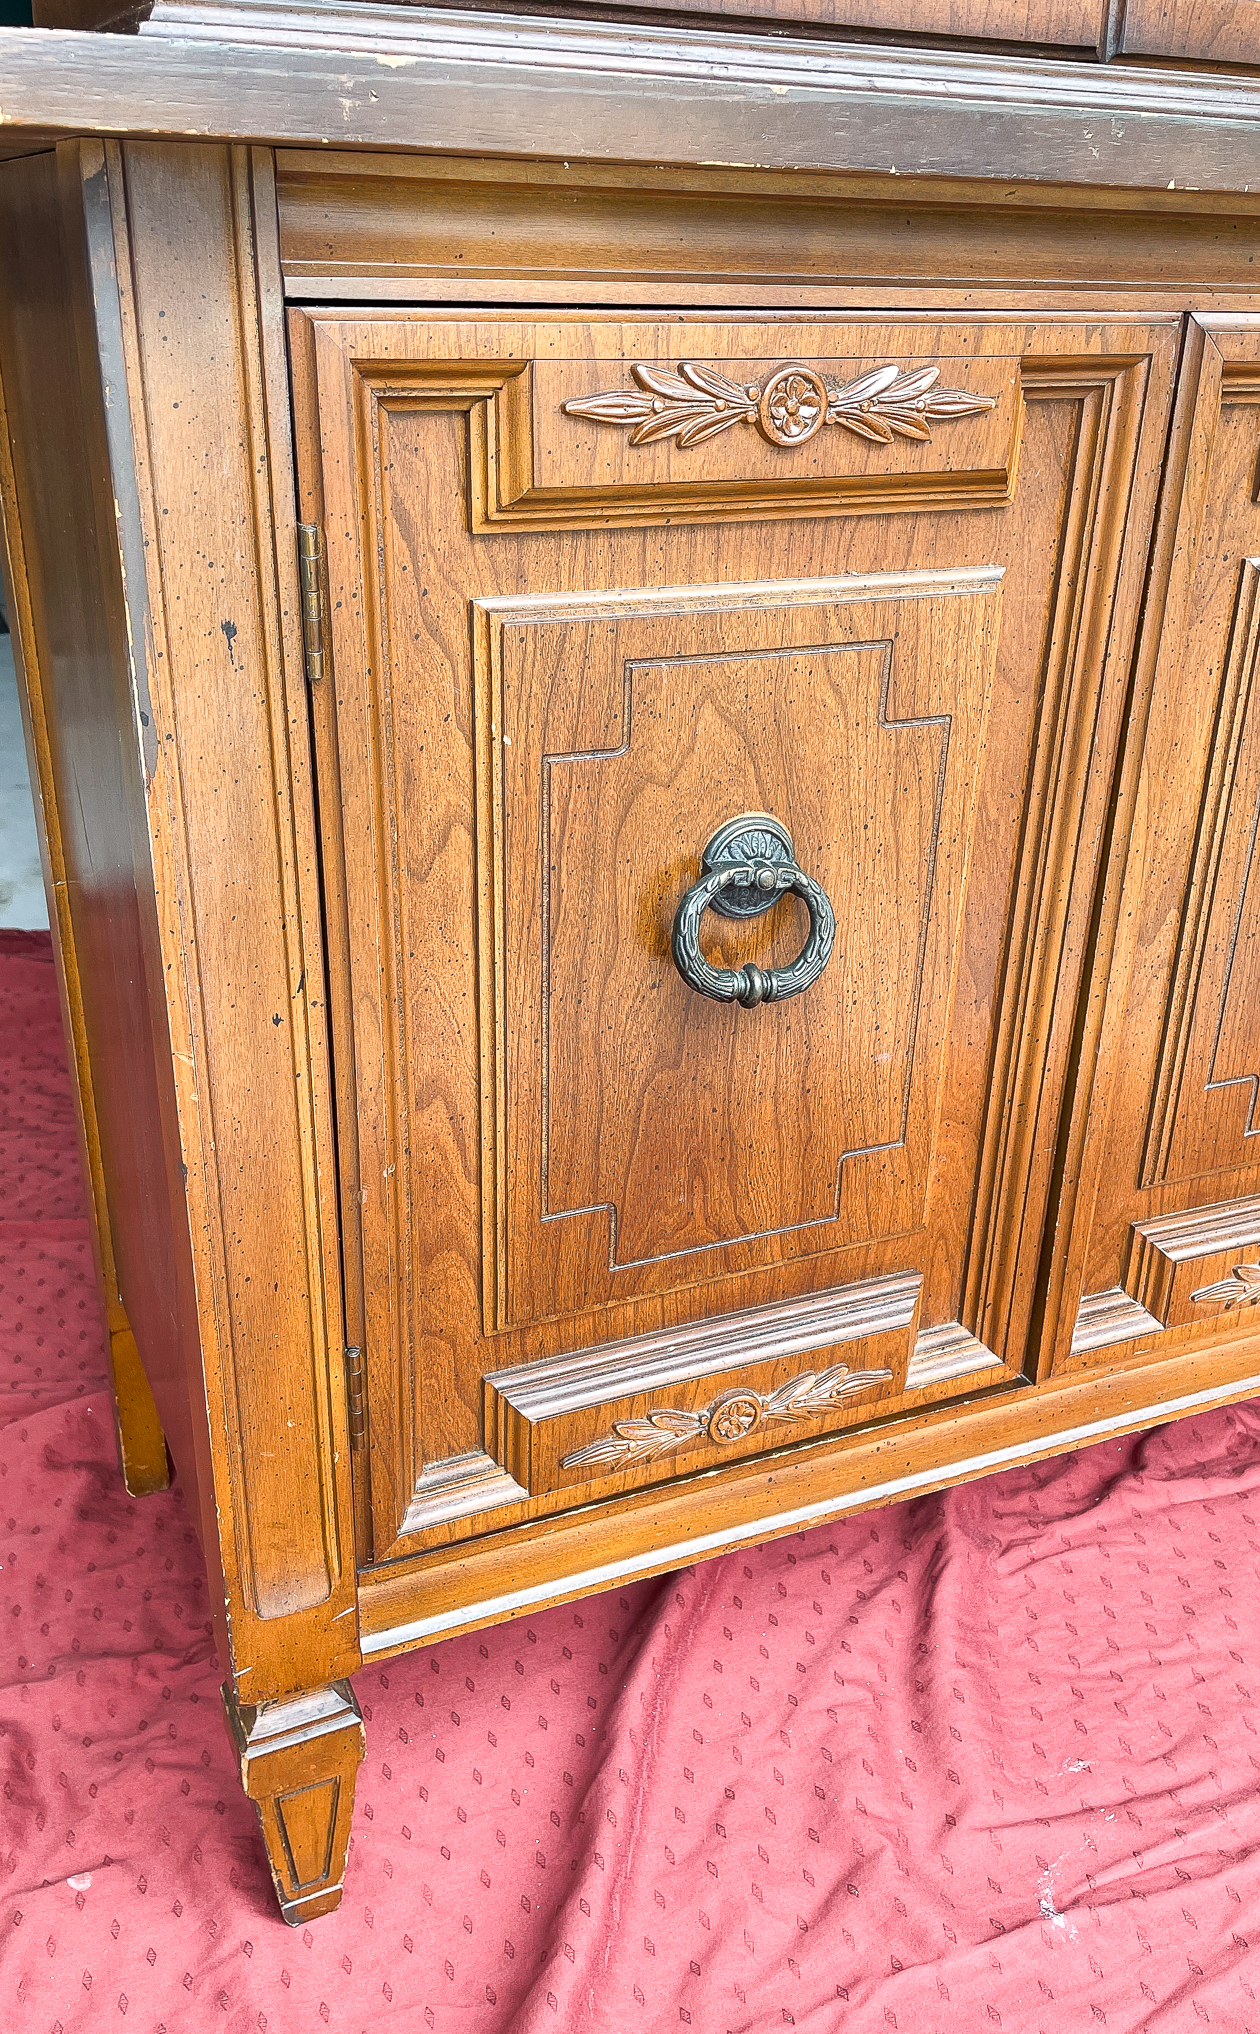
I decided to keep the hardware from the top cabinets and polish it with Brasso. It’s not perfect, and there’s still wear, but it came out noticeably better and I felt good about keeping them. The hardware from the bottom cabinets were really not my style, so I removed them. Any noticeable notes or imperfections were filled with wood filler (especially under the old bottom cabinet hardware).
After all of that, it was time to sand. I used a hand sander for the larger, smoother pieces and then sanded the details by hand. This is such an important step because it gives the primer something to grip to. It also helps smooth out any uneven surfaces and makes flaws less noticeable.
The Priming
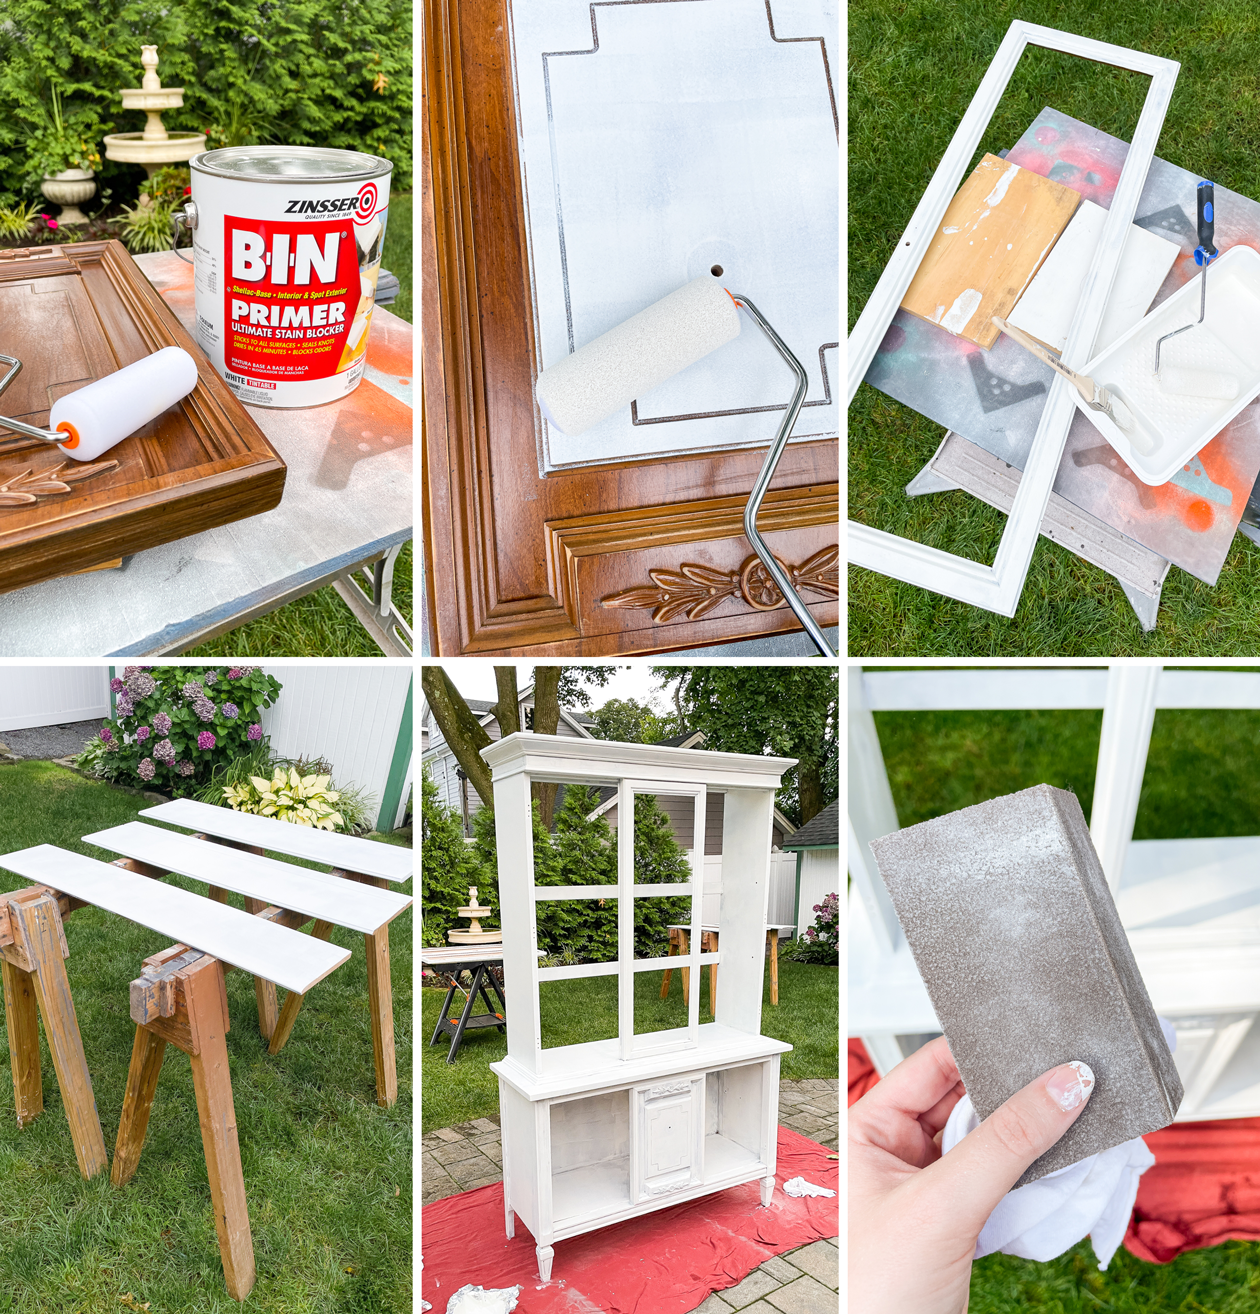 I’m in love! With a primer! I have a few projects happening behind the scenes right now and BIN Primer is getting me through all of them. It comes in a spray paint or a can and I opted for the gallon because this was such a large piece. I did have plenty leftover and will be using this in the future for sure. It works on several different surfaces and is perfect for Ikea hacks.
After the first coat of primer was rolled on, I let the hutch dry overnight. In the morning, I sanded down any imperfections and cleaned the surface one more time so that the paint would go on as smooth as possible.
And that’s where I’ll leave you for today! Be sure to come back tomorrow to see what color I chose and how the final piece turned out!
xo
Rachel
PS in case you’re wondering from the photos– no we don’t have a backyard! We worked on this project out at Ryan’s parents’ house.
The post Before and After: Hutch Makeover (Part 1) appeared first on The Crafted Life.