
10 DIY Garage Shelving Units With Basket Ideas
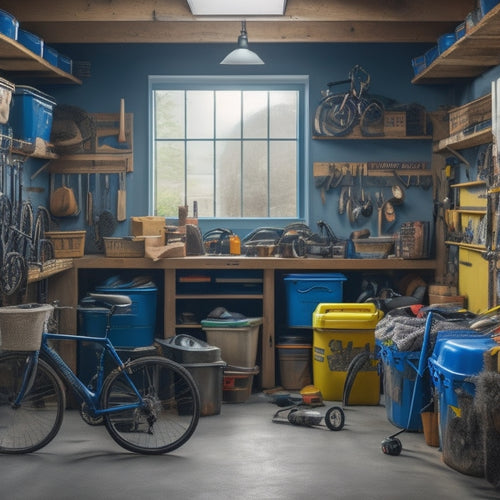
You're about to transform your cluttered garage into a sleek and organized space with these 10 DIY garage shelving units that incorporate practical basket ideas, helping you maximize storage and minimize stress. From simple shelves with wicker baskets to industrial pipe shelving units, you'll find a solution that fits your style and needs. Create a sliding basket storage system or upcycle pallets to create unique shelving units. With adjustable shelving, wall-mounted basket organizers, and ceiling-mounted storage racks, you'll be able to customize your garage's storage to perfection. Now, get ready to discover the perfect combination to tame your garage's chaos.
Key Takeaways
• Customize DIY garage shelving units with baskets in various sizes, materials, and colors to fit specific storage needs and garage aesthetics.
• Incorporate label systems and organization strategies to maximize storage efficiency and accessibility.
• Choose durable and sturdy shelving materials, such as industrial pipes or reclaimed pallets, to support heavy tools and equipment.
• Consider vertical space and corner areas when designing garage shelving units to optimize storage capacity.
• Add decorative touches, like wicker or seagrass baskets, to enhance garage decor while maintaining functionality.
Simple Shelves With Wicker Baskets
You can create a charming and functional storage solution by building simple shelves and adding wicker baskets to store items like tools, sports equipment, or seasonal decorations. This DIY project is perfect for organizing your garage while adding a touch of rustic charm.
When choosing wicker baskets, consider the color palette that complements your garage's aesthetic. You can opt for natural hues like beige, brown, or gray, or go for bold colors like red, blue, or green to add a pop of color. Additionally, you can customize the basket size to fit your specific storage needs. Larger baskets can store bulky items like camping gear or luggage, while smaller ones are perfect for small tools or accessories.
To take your storage solution to the next level, consider adding labels or tags to each basket to identify what's inside. This will make it easy to find what you need quickly and maintain your organized space.
With simple shelves and wicker baskets, you'll be able to keep your garage clutter-free and stylish.
Industrial Pipe Shelving Units
Four industrial pipe shelving units can be constructed to provide ample storage space for heavy tools, machinery, and equipment, while adding a rugged, industrial touch to your garage. You can create a unique pipe shelving design that reflects your personal style and meets your specific storage needs.
For instance, you can use black pipes for a sleek, modern look or galvanized pipes for a more rustic, vintage vibe.
To maximize storage, incorporate creative basket storage into your industrial pipe shelving units. You can hang wicker or metal baskets from the pipes to store smaller items like nuts and bolts, screws, or other hardware. Label each basket so you can easily find what you need.
You can also add wooden or metal shelves between the pipes to store larger items like power tools, machinery, or equipment.
When constructing your industrial pipe shelving units, make sure to measure carefully and use sturdy materials to guarantee they can hold the weight of your tools and equipment.
With a little creativity and some basic DIY skills, you can create a functional and stylish storage system that keeps your garage organized and clutter-free.
Sliding Basket Storage System
As you design your sliding basket storage system, you'll need to determine the ideal basket size for your garage's specific needs. You'll want to take into account the types of items you'll be storing, from small tools to larger equipment, and choose a size that accommodates them comfortably.
Next, you'll need to select a sliding mechanism that's sturdy enough to support the weight of your baskets and allows for smooth, hassle-free access.
Basket Size Options
With a sliding basket storage system, versatile basket size options let you customize your garage shelving units to accommodate items of varying shapes and sizes. You can choose from a range of basket sizes to fit your specific storage needs.
For instance, you might opt for smaller baskets to store small parts, tools, or accessories, while larger baskets can hold bigger items like camping gear or seasonal decorations.
When selecting basket sizes, consider the types of items you'll be storing and how often you'll need to access them. You'll also want to think about the overall aesthetic you're aiming for in your garage.
With basket material options like wire, wood, or plastic, and basket color choices that range from neutral tones to bold hues, you can create a cohesive look that complements your garage's style.
Sliding Mechanism Design
You'll want to guarantee your sliding basket storage system is equipped with a dependable and smooth sliding mechanism design that glides effortlessly, allowing you to access your stored items quickly and easily. A well-designed mechanism will make all the difference in the functionality of your DIY garage shelving unit.
When selecting a sliding mechanism, consider the weight capacity and durability of the system. Look for mechanisms with soft-close features to prevent slamming and ensure smooth operation.
For a seamless installation, follow these installation tips: first, verify the sliding shelf is level before attaching it to the wall or adjacent shelving unit. Next, align the tracks and secure them firmly to prevent any wobbling or movement. Finally, test the sliding mechanism to ensure it operates smoothly and quietly.
With a dependable sliding mechanism design, you'll be able to maximize your storage space while maintaining easy access to your belongings. By investing time in selecting the right mechanism and following proper installation tips, you'll enjoy a functional and efficient sliding basket storage system that meets your needs.
DIY Garage Cabinet With Bins
As you start building your DIY garage cabinet with bins, you'll need to ponder the overall cabinet design, taking into account the space you have available and the items you want to store.
You'll also want to think about how you'll organize the bins themselves, so everything is easy to find and access.
Cabinet Design Considerations
Designing a DIY garage cabinet with bins requires careful consideration of several key factors, including the type and quantity of items you plan to store, the available space, and your personal preferences for accessibility and aesthetics. When it comes to cabinet design, you'll need to think about the overall look and feel you want to achieve, as well as the functionality you need.
Here are some key considerations to keep in mind:
-
Cabinet material choices: Will you opt for sturdy metal, durable wood, or sleek laminate? Each material has its pros and cons, so choose wisely.
-
Space utilization techniques: Think vertically by installing shelves, hooks, or baskets to maximize storage capacity.
-
Accessibility features: Consider adding drawers, pull-out bins, or adjustable shelves to make it easy to grab what you need.
-
Customization options: Think about adding dividers, labels, or inserts to create a tailored storage solution.
-
Budget constraints: Set a budget and adhere to it to guarantee your DIY project stays on track.
Bin Organization Strategies
To optimize storage capacity and make the most of your DIY garage cabinet with bins, create a thoughtful bin organization strategy that suits your specific needs and preferences. This will help you maximize the use of your cabinet's space and make it easier to find what you need when you need it.
Start by implementing a color coordination system, where similar items are stored in bins of the same color. This visual approach will help you quickly identify where items are stored.
Next, customize your storage by assigning specific bins to particular categories, such as tools, sports equipment, or seasonal decorations. A labeling system will also help you keep track of what's inside each bin, making it easier to retrieve items and maintain your organization.
Shelving Configuration Options
You'll need to decide on a shelving configuration that complements your bin organization strategy, ensuring a harmonious and functional storage system in your DIY garage cabinet. This is where your creativity and problem-solving skills come into play. Take into account the items you'll be storing, the space available, and the overall aesthetic you want to achieve.
Here are some shelving configuration options to take into account:
-
Custom shelving solutions: Design your shelves to fit specific items, like long-handled tools or bulky storage bins, for a tailored fit.
-
Space saving shelving: Opt for vertical shelving units or corner shelves to maximize storage capacity while minimizing floor space.
-
Adjustable shelving: Install shelves with adjustable heights to accommodate items of varying sizes and shapes.
-
Fixed shelving: Use fixed shelves for storing heavy or large items, like bins or equipment, that won't need to be moved frequently.
-
Tiered shelving: Create a multi-level shelving system to store items of different sizes and types, adding visual interest and functionality to your garage cabinet.
Adjustable Shelving With Fabric Baskets
Adding adjustable shelving with fabric baskets to your garage storage system lets you maximize vertical space while keeping clutter at bay and essential items within easy reach. With this setup, you can customize the shelves to fit your specific needs, ensuring that everything has a designated spot.
This clever DIY storage idea is perfect for storing items like seasonal decorations, out-of-season clothing, or tools. The fabric baskets add a touch of style to your garage while keeping contents hidden from view.
To take your creative organization techniques to the next level, consider using baskets with labels or tags. This way, you can quickly identify what's inside without having to rummage through the contents.
When choosing fabric baskets, opt for durable, easy-to-clean materials that can withstand the garage environment. By incorporating adjustable shelving with fabric baskets into your garage storage system, you'll be able to maintain a clutter-free space that's both functional and visually appealing.
With a little creativity, you can create a garage that's not only organized but also reflects your personal style.
Modular Storage With Plastic Bins
By incorporating modular storage with plastic bins into your garage organization system, you can create a flexible and versatile space that adapts to your changing storage needs. This type of storage solution is perfect for garages with limited space, as it allows you to maximize your vertical storage capacity.
Here are some benefits of using modular storage with plastic bins:
-
Easy to assemble and disassemble: Modular storage units are designed to be easy to put together and take apart, making it simple to reconfigure your storage space as needed.
-
Customizable: You can choose from a variety of bin sizes and shapes to fit your specific storage needs, and add or remove bins as needed.
-
Durable: Plastic bins are durable and can withstand the rigors of garage storage, including dust, dirt, and moisture.
-
Versatile: Modular storage units can be used for a variety of storage tasks, from storing tools and equipment to keeping seasonal decorations organized.
-
Cost-effective: Compared to traditional shelving units, modular storage with plastic bins is often more affordable and cost-effective.
Upcycled Pallet Shelving Idea
When you're building an upcycled pallet shelving unit, you'll need to start by selecting the right pallets for the job - and that means considering factors like size, material, and condition.
Next, you'll need to take those pallets apart, carefully extracting the individual planks and components that will become the building blocks of your shelving unit.
With your pallets disassembled, you'll be ready to start assembling your shelving unit, using those reclaimed planks to create a sturdy and functional storage solution.
Pallet Selection Criteria
You'll want to choose pallets that are sturdy, clean, and free of damage to secure your DIY garage shelving unit turns out safe and functional. When selecting pallets, consider the following criteria to make sure you get the right ones for your project:
-
Pallet durability: Opt for pallets made from high-quality wood that can support the weight of your storage items. Avoid pallets with signs of rot, cracks, or broken boards.
-
Size compatibility: Choose pallets that are the right size for your garage shelving unit. Measure the space where you plan to install the shelves and select pallets that fit snugly.
-
Cleanliness: Select pallets that are free from dirt, oil, or other substances that could damage your storage items or attract pests.
-
Moisture content: Pick pallets with a low moisture content to prevent warping or cracking over time.
-
Aesthetics: Consider the color and texture of the pallets and how they'll fit with your garage's decor.
Pallet Disassembly Process
Now that you've selected the ideal pallets, it's time to break them down into usable components for your upcycled garage shelving project. Pallet dismantling requires some elbow grease, but it's an essential step in wood recycling. Start by removing the pallet's top and bottom planks, which are usually held together by nails or screws. Use a pry bar or a hammer to gently dislodge the planks, taking care not to damage the wood.
Next, remove the vertical support beams, which can be used as shelves or supports for your DIY garage shelving unit. Set these aside, as they'll come in handy later.
Continue disassembling the pallet, separating the various components into piles of usable wood. Be mindful of any broken or damaged pieces, as these can be repurposed or recycled.
As you work, keep an eye out for any nails, screws, or other metal fasteners that may be embedded in the wood. Remove these to make sure your DIY project is safe and secure.
With your pallets disassembled, you're now ready to move on to the next step: creating your upcycled garage shelving unit.
Shelving Unit Assembly
With your pallet components sorted and prepared, start building your upcycled garage shelving unit by laying out the vertical support beams as the base, making sure they're evenly spaced and sturdy enough to hold the weight of your desired storage. This foundation will provide a solid base for your shelving unit, allowing you to customize it to fit your specific needs.
To ensure a successful assembly, keep the following tips in mind:
-
Use screws or nails to secure the beams together, ensuring they're tightly fastened.
-
Add horizontal shelves, spaced evenly apart, to create a sturdy and functional storage space.
-
Consider adding a back panel to prevent items from falling off the back of the shelves.
-
Use a level to make sure the shelves are perfectly horizontal and the unit is plumb.
-
Don't be afraid to get creative with your shelving unit customization – add baskets, bins, or hooks to maximize storage and make the most of your upcycled pallet shelving unit.
Wall-Mounted Basket Organizers
They're perfect for maximizing storage in tight spaces, and wall-mounted basket organizers can be easily installed to keep frequently used items within easy reach. As you plan your DIY garage shelving unit, take into account incorporating these versatile organizers to optimize your storage capacity.
When it comes to choosing wall-mounted basket organizers, you have several options to explore. Here are a few:
| Feature | Options |
|---|---|
| Basket Hanging Options | Hooks, Knobs, or Sliding Rails |
| Basket Color Coordination | Match with Shelving Unit, Neutral, or Accent Colors |
| Number of Baskets | 2, 3, or 4 Baskets per Organizer |
With these organizers, you can create a customized storage solution that fits your specific needs. For instance, you can hang baskets with hooks for easy access or use knobs for a more rustic look. By selecting baskets that match your shelving unit's color scheme, you can create a cohesive aesthetic that enhances the overall look of your garage.
Corner Shelving With Seagrass Baskets
You can capitalize on the often-wasted space in corners by incorporating corner shelving units with seagrass baskets. This clever combination not only maximizes storage but also brings a touch of sophistication to your garage's decor. Seagrass decor accents are a great way to add warmth and texture to your space, and corner storage solutions can help keep clutter at bay.
Here are some benefits to take into account:
-
Customize your basket color options to match your garage's aesthetic, from natural hues to bold statements.
-
Corner shelving units can be installed at varying heights to accommodate different item sizes and types.
-
Space saving shelving ideas like corner units help keep floors clear and make the most of your garage's square footage.
-
Seagrass baskets are durable and easy to clean, making them a practical choice for garage storage.
-
By incorporating corner shelving with seagrass baskets, you'll create a functional and stylish storage solution that's uniquely yours.
Ceiling-Mounted Storage Racks
By installing ceiling-mounted storage racks, you'll access valuable floor and wall space in your garage, allowing you to park your vehicle more comfortably or add more storage solutions. These racks are perfect for storing infrequently used items like seasonal decorations, luggage, or out-of-season sports equipment.
When it comes to DIY installation, start by verifying your garage ceiling can support the weight of the racks and the items you plan to store. Next, choose a sturdy rack system that's designed for ceiling mounted storage. Follow the manufacturer's instructions for assembly and installation, taking care to securely anchor the racks to the ceiling.
Some DIY installation tips to keep in mind include using a level to confirm the racks are straight, and considering the height and accessibility of the racks when determining their placement. With a little planning and effort, you can maximize your garage's storage potential and keep your floor and walls clutter-free.
Frequently Asked Questions
Can I Use Reclaimed Wood for My DIY Garage Shelving Units?
You can definitely use reclaimed wood for your shelving units, but be sure to inspect it carefully for damage and decay to guarantee stability; also, consider using metal brackets for added support to prevent collapse.
How Do I Secure Heavy Items on My Shelving Units?
As you're building your shelving empire, remember that securing heavy items is like anchoring a ship in a storm - you need solid anchoring techniques to prevent catastrophic weight distribution failures.
Are There Any DIY Shelving Ideas for Small Garages?
You're working with limited space, so maximize it! Consider wall-mounted shelves, hanging baskets for storage, and overhead storage for infrequently used items. Don't forget pegboard organization for tools and accessories to keep your small garage tidy and functional.
Can I Add Casters to Make My Shelving Units Mobile?
You can add casters to make your shelving units mobile, but make sure you prioritize shelving stability to prevent wobbling or tipping, especially when loaded with heavy storage solutions.
How Do I Protect My Shelving Units From Moisture and Humidity?
Just as a sturdy umbrella shields you from torrential rains, you'll want to safeguard your shelving units from moisture and humidity. Invest in a dehumidifier, opt for moisture-resistant materials, and master sealing techniques and ventilation solutions to guarantee a dry, durable space.
Related Posts
-
What Apps Help You Tame Your Garage Chaos?
You can tame your garage chaos with apps like Sortly and Garage Organizer, which help you digitally label and categor...
