
10 Essential DIY Garage Organization Hacks
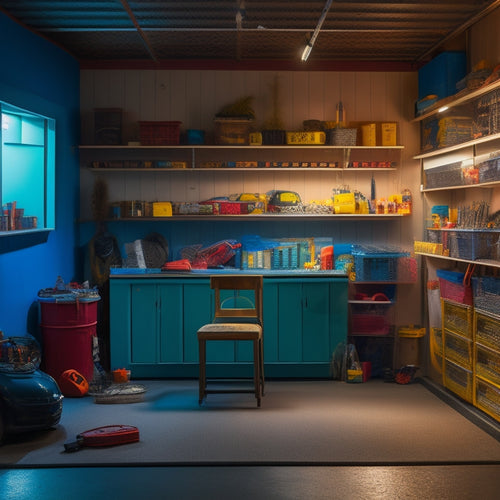
You're just a few DIY garage organization hacks away from transforming your cluttered garage into a sleek, functional space that's both efficient and enjoyable to be in. Start by utilizing vertical storage space with wall shelving, ceiling hooks, and adjustable shelving. Create a tool station with pegboards, hooks, and bins, and designate zones for clutter with color-coded storage bins and floor marking. Maximize corner storage, label and sign everything, and install a sliding pegboard for easy access. Build a DIY workbench, use clear storage bins, and hang bikes and accessories to free up valuable space. Now, discover the secrets to a perfectly organized garage.
Key Takeaways
• Utilize vertical storage space by installing wall shelving, ceiling hooks, and adjusting shelving to maximize storage capacity and free up floor space.
• Create a tool station with pegboards, hooks, and bins to centralize and organize frequently used tools and supplies, and consider adding a charging station.
• Designate zones for clutter by color-coding storage bins, using floor marking, and labeling to assign a home for each item and prevent clutter buildup.
• Maximize corner storage by using corner shelving, hidden hooks, ceiling racks, and ladder storage to keep items off the floor and out of the way.
• Implement a labeling and signing system using color coding, inventory tracking, and clear handwriting to maintain a sense of order and easy identification of stored items.
Utilize Vertical Storage Space
How much of your garage's vertical storage space is going to waste, collecting dust and cobwebs? It's time to maximize that space and get organized! Installing wall shelving is a great way to start. You can store bins, baskets, and containers filled with items like seasonal decorations, out-of-season clothing, and camping gear. This will keep them off the floor, freeing up valuable space for your car or workbench. Consider adjustable shelving to accommodate items of different sizes.
Don't forget about the ceiling! Ceiling hooks are perfect for hanging bikes, kayaks, or other bulky items that are difficult to store. You can also use them to hang bins or bags filled with items like sports equipment or gardening tools.
Create a Tool Station
You'll save time and reduce frustration by designating a specific area of your garage as a tool station, where you can centralize and organize your most frequently used tools and supplies. This dedicated space will become the hub of your garage, making it easy to find what you need when you need it.
When creating your tool station, consider the following ideas:
-
Incorporate tool organization systems, such as pegboards, hooks, and bins, to maximize storage solutions and keep your tools within easy reach.
-
Build or install a DIY workbench with customization options, like built-in drawers or shelves, to provide a dedicated workspace for projects.
-
Add a vise or other clamping system to hold materials in place, making it easier to work on projects.
- Incorporate a charging station for your power tools, keeping them powered up and ready to go.
Designate Zones for Clutter
When organizing your garage, you'll need to think strategically about how to allocate space to different types of clutter. By designating specific zones for specific types of items, you'll be able to keep similar items together and make the most of your available space.
Next, we'll explore how to assign tasks to areas, categorize clutter types, and develop a zone allocation strategy that works for you.
Zone Allocation Strategy
By designating specific zones for clutter, you'll create a functional framework that streamlines your garage organization project and prevents clutter from spreading unchecked. This zone allocation strategy allows you to categorize and contain clutter, making it easier to maintain your garage's organization.
Here are some tips to help you allocate zones effectively:
-
Color code storage bins to categorize items, such as red for tools, blue for sports equipment, and green for seasonal decorations.
-
Floor marking can help define zones and create a visual distinction between areas.
-
Zone labeling is essential to identify what's stored in each zone, making it easier to find what you need.
- Assign a home for each item, ensuring everything has a designated place to prevent clutter from building up again.
Assign Tasks to Areas
Now that you've categorized your items and allocated zones, it's time to designate specific areas for tasks that require frequent attention, such as a workstation for DIY projects or a maintenance zone for your vehicles.
This task delegation strategy will streamline your workflow, saving you time and energy in the long run. By assigning tasks to areas, you'll create an efficient system that allows you to focus on the task at hand without distractions.
For instance, a dedicated workstation for DIY projects can include a workbench, tool storage, and a vice, making it easy to complete projects quickly and effectively.
Similarly, a maintenance zone for your vehicles can include a car lift, tool chests, and a parts storage area, ensuring that you have everything you need to keep your vehicles in top condition.
Categorize Clutter Types
Beyond the designated task areas, you'll likely have clutter types that don't fit neatly into your workflow, such as seasonal decorations, out-of-season clothing, or abandoned projects, which require their own zones to prevent them from encroaching on your productive space.
To tackle this, implement effective decluttering strategies by categorizing your clutter into distinct types. This will enable you to create tailored organization tips and storage solutions for each category.
Here are some common clutter types to ponder:
-
Seasonal items: Store seasonal decorations, holiday lights, or winter clothing in labeled bins or containers to keep them out of the way.
-
Project materials: Designate a zone for ongoing projects, such as a craft station or a workbench, to keep materials organized and within reach.
-
Archive storage: Set aside an area for infrequently used items, like old documents or memorabilia, and store them in labeled files or boxes.
- Donation station: Create a zone for items you plan to donate or sell, making it easy to gather and transport them when the time comes.
Maximize Corner Storage
You can vastly increase your garage's storage capacity by utilizing corner space, often the most underutilized area in the room. By installing corner shelving, you can store bins, baskets, and other containers, keeping them off the floor and out of the way. Add hidden hooks to hang items like bikes, tools, or accessories, maximizing every inch of space.
Here are some ideas to get you started:
| Corner Storage Idea | Benefits |
|---|---|
| Corner shelving | Stores bins, baskets, and containers |
| Hidden hooks | Hangs bikes, tools, and accessories |
| Ceiling racks | Stores infrequently used items, like seasonal decorations |
| Ladder storage | Stores ladders, keeping them off the floor |
| Adjustable shelving | Accommodates items of varying sizes |
Label and Sign Everything
By labeling and signing every storage bin, shelf, and hook, you can maintain a sense of order and make it simple to locate specific items in your newly organized garage. This simple yet effective step will help you establish a system that promotes organization and efficiency. With clear labels, you'll be able to identify what's inside each bin or on each shelf without having to dig through everything.
Here are some tips to take your labeling and signing to the next level:
-
Use color coding to categorize similar items, such as tools, sports equipment, or seasonal decorations, to create a visually appealing and organized system.
-
Implement inventory tracking by labeling each item with its contents, quantity, and date stored to make sure you can easily find what you need and keep track of your inventory.
-
Create a key or legend to explain the labeling system, so everyone in the household can understand it.
- Consider using a label maker or writing labels by hand in a bold, easy-to-read font to make certain they're easy to spot.
Repurpose Old Furniture
How can you breathe new life into old furniture and turn it into a functional storage solution for your garage?
With a little creativity, you can repurpose old furniture to create unique and effective storage solutions. Consider upcycling an old dresser into a storage unit for tools and supplies, or converting an old bookshelf into a shelving system for bins and containers.
You can even repurpose an old pallet into a hanging organizer for bikes, tools, or accessories.
Furniture repurposing ideas are endless, and they can add a touch of personality to your garage while keeping clutter at bay. Upcycling projects like these can also be a fun and eco-friendly way to reduce waste and give old items a new purpose.
By thinking outside the box, you can create custom storage solutions that meet your specific needs and fit your garage's unique style. So, don't be afraid to get creative and give old furniture a new lease on life.
With a little bit of imagination, you can turn cluttered chaos into organized calm.
Install a Sliding Pegboard
As you prepare to install a sliding pegboard, you'll need to determine where to place it for maximum efficiency.
You'll want to contemplate the layout of your garage and choose a spot that allows easy access to the tools and supplies you use most often.
Pegboard Placement Options
You'll maximize your garage's storage potential by strategically placing a pegboard in a high-traffic area, such as near a workbench or above a toolbox. This placement allows for easy access to frequently used tools and equipment, streamlining your workflow.
When it comes to pegboard organization, consider the following garage wall solutions:
-
Above a workbench: Install the pegboard above your workbench to create a convenient tool station. This placement keeps your work surface clear and allows you to quickly grab the tools you need.
-
Near a toolbox: Place the pegboard adjacent to your toolbox to create a centralized storage hub. This setup enables you to store larger items in the toolbox and hang smaller tools on the pegboard.
-
On a freestanding panel: Mount the pegboard on a freestanding panel, allowing you to move it around the garage as needed.
- On a wall with a fold-down table: Combine a pegboard with a fold-down table to create a versatile workstation that saves floor space.
Maximizing Storage Space
Maximizing Storage Space
By incorporating a sliding pegboard into your garage organization system, you can effectively double your storage capacity without sacrificing valuable floor space. This space-saving solution is perfect for garages with limited square footage, allowing you to maximize your storage potential.
Here are some benefits of installing a sliding pegboard:
| Benefits | Description |
|---|---|
| Increased Storage | Store more items without taking up floor space |
| Easy Access | Slide the pegboard out to access items in the back |
| Customizable | Add hooks, bins, and other accessories to fit your needs |
| Space-Efficient | Perfect for small garages or tight spaces |
Build a DIY Workbench
Create a sturdy foundation for your garage organization project by constructing a DIY workbench that suits your specific needs and space constraints. This will provide a dedicated area for working on projects, storing tools, and keeping everything within easy reach.
With a DIY workbench, you can customize the design to fit your unique requirements, incorporating features like built-in cabinets, drawers, or shelves to maximize storage.
Consider the following ideas to take your DIY workbench to the next level:
-
Incorporate DIY workbench upgrades, such as adding a vice or installing a pegboard for hanging tools
-
Design custom shelving ideas to store frequently used items, like bins, baskets, or containers
-
Opt for space-saving workbench solutions, like a foldable or wall-mounted design, to conserve floor space
- Invest in an organization toolkit, complete with bins, labels, and dividers, to keep your workstation tidy and efficient
Use Clear Storage Bins
Use Clear Storage Bins
Utilize clear storage bins to categorize and store small items like nuts, bolts, and screws, making it easy to identify what's inside without having to rummage through cluttered containers. This is a game-changer for your garage organization, as it saves you time and reduces frustration. With clear bins, you can see what's inside without having to label every single item.
Here are some benefits of using clear storage bins:
| Benefits | Description | Example |
|---|---|---|
| Easy Identification | Quickly identify contents without labels | See screws, nuts, and bolts inside |
| Reduced Clutter | Less clutter means more space | More room for tools and projects |
| Increased Efficiency | Spend less time searching | Find what you need in seconds |
| Improved Label Organization | Labels become unnecessary | Focus on categorizing instead |
Hang Bikes and Accessories
Now that you've got your storage bins in order, it's time to tackle the bulkier items in your garage - like your bikes and their accessories.
You'll want to hang them in a way that maximizes floor space and keeps them easily accessible.
Bike Storage Ideas
You can reclaim valuable floor space and keep your garage organized by strategically hanging your bikes and accessories from the ceiling or walls. This not only frees up room for other storage solutions but also makes it easier to perform routine bike maintenance. By elevating your bikes, you can sweep and clean the floor more easily, reducing the risk of dirt and debris accumulating and affecting your bike's performance.
Here are some bike storage ideas to get you started:
-
Install a pulley system to hang your bikes from the ceiling, allowing you to easily lift and lower them as needed
-
Use wall-mounted hooks to store your bikes, keeping them neatly organized and out of the way
-
Invest in a bike rack that can hold multiple bikes, perfect for families or cycling enthusiasts
- Consider a foldable bike stand that can be easily stored away when not in use, ideal for small garages or those with limited space
Accessory Mounting Options
By strategically mounting accessories like helmets, gloves, and bike lights, you can maximize your garage's storage potential and keep everything within easy reach. This is especially important for cyclists, who often have a plethora of gear that can clutter up the garage floor. Consider installing ceiling storage solutions, such as hooks or bins, to hang items like helmets, gloves, and bike lights. This won't only free up floor space but also keep your accessories organized and easily accessible.
For smaller items like bike tools, patches, or accessories, think outside the box with creative uses for magnetic strips. You can attach them to metal cabinets, walls, or even the ceiling to store small metal items. This innovative solution will keep your workspace tidy and make it easy to find what you need when you need it.
Frequently Asked Questions
How Do I Maintain My Garage Organization System Over Time?
As you're enjoying your newly organized garage, remember that maintaining it is just as important as creating it - use storage bins and labeling to keep clutter at bay, and incorporate seasonal rotation and regular maintenance to make sure your system stays on track.
Can I DIY Garage Organization With Limited Budget and Skills?
You can definitely DIY garage organization on a limited budget and with basic skills; start with budget-friendly storage solutions like repurposed crates and shelving, and incorporate beginner-friendly garage hacks, like labeling and categorizing, to maximize your space.
How Do I Involve My Family in the Garage Organization Process?
You involve your family in the garage organization process by framing it as a fun, bonding experience, assigning tasks that play to each person's strengths, and working together to find creative storage solutions that make the garage cleanup a true team effort.
What Are Some Garage Organization Ideas for Small or Narrow Garages?
"Can you squeeze one more bike into your cramped garage? Probably not. You'll maximize space with vertical storage units and mobile shelving that glide effortlessly, freeing up floor space and making the most of your narrow garage's potential."
How Often Should I Reorganize and Purge My Garage Storage?
You should reorganize and purge your garage storage seasonally, rotating items to guarantee accessibility and relevance. Set a decluttering schedule, ideally every 3-6 months, to maintain a clutter-free space and optimize storage frequency.
Related Posts
-
Shelving Solutions for Small Garage Spaces
You can optimize your small garage space by implementing strategic shelving solutions that maximize vertical storage,...
-

3 Best Garage Business Productivity Apps for Iphone
You can take your garage business to the next level with three must-have iPhone apps. For inventory tracking, conside...
