
7 Best Budget-Friendly Garage Renovation Hacks Revealed
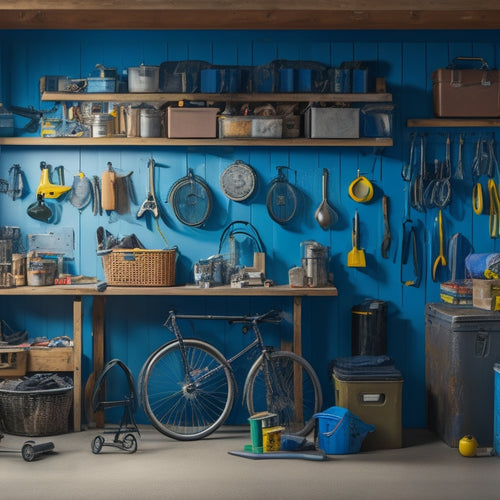
You're about to reveal the secrets to a stunning garage renovation on a shoestring budget! Repurpose old materials to create unique elements, like upcycled pallets and doors. Transform your walls with a fresh coat of paint, using vibrant colors and textured finishes to hide imperfections. DIY shelving units will maximize your storage space, while epoxy-coated floors and affordable lighting solutions will brighten up the area. Don't forget to declutter before you start, and get creative with old furniture pieces. By applying these 7 budget-friendly hacks, you'll be amazed at how far your renovation dollars can stretch - and you're just getting started!
Key Takeaways
• Repurpose old materials like pallets, doors, and furniture to create functional elements, reducing waste and saving money.
• Use budget-friendly and durable epoxy coating or rubber matting to transform garage flooring and protect it from stains and chemicals.
• Build DIY shelving units using reclaimed materials to maximize vertical space and create customized storage solutions.
• Choose affordable and energy-efficient LED or CFL bulbs for garage lighting, and direct light where needed with task lighting and shop lights.
• Declutter the garage space before renovation by sorting items into categories and investing in storage solutions to create a functional layout.
Repurpose Old Materials Creatively
Transform your garage renovation from bland to grand by repurposing old materials creatively, giving new life to items you might've otherwise tossed in the trash. You'll not only reduce waste but also create a unique, eco-friendly space that reflects your personal style.
Start by thinking outside the box - or in this case, the garage. Consider upcycling old pallets into shelves or a workbench, or repurposing an old door as a functional storage unit. This creative approach to storage won't only save you money but also add a touch of industrial chic to your garage.
As you get creative, remember that sustainable design is key. By reusing and repurposing materials, you're reducing your carbon footprint and creating a more environmentally friendly space. So don't be afraid to think creatively and get crafty - your garage (and the planet) will thank you.
With a little imagination, you can turn your garage into a functional, stylish space that's both budget-friendly and eco-conscious.
Paint Magic for Garage Walls
As you prepare to revamp your garage walls, you'll want to tackle the canvas with a solid game plan.
You'll need to prime those walls for a fresh start, cover up any imperfections that are currently driving you crazy, and then release your creativity with a vibrant color palette that reflects your personal style.
Priming for a Fresh Start
With a thorough cleaning of your garage walls, you're now ready to apply a primer that will create a smooth, even surface for painting. This essential step guarantees a professional-looking finish and helps your paint job last longer.
When selecting a primer, opt for a sustainable solution that's low in VOCs (volatile organic compounds) to minimize environmental impact. Look for eco-friendly brands that offer high-quality, budget-friendly options.
Before applying the primer, make sure to fix any holes or cracks in the walls using a DIY organization tip: fill them with spackling compound and sand them smooth. This will create a seamless surface for painting.
Use a roller to apply the primer, working in sections to maintain even coverage. Allow the primer to dry completely before painting, following the manufacturer's instructions.
Hiding Imperfections With Ease
You'll be amazed at how a fresh coat of paint can disguise imperfections on your garage walls, making them look like new again. By using clever techniques, you can effectively conceal those unsightly blemishes, cracks, and stains that have been bothering you for years.
One of the most effective ways to mask flaws is to use a textured paint finish. This will help to create a uniform appearance, drawing attention away from imperfections and towards the overall aesthetic of your garage. Additionally, consider using a paint with a built-in primer to guarantee maximum coverage and adhesion.
When it comes to concealing blemishes, creative solutions abound. For instance, you can use a darker shade of paint to hide stains or marks on the walls. Alternatively, apply a lighter shade to make small cracks or dents less noticeable.
With a little creativity and the right techniques, you can give your garage walls a fresh, flawless look without breaking the bank.
Vibrant Color Options
Now that you've mastered the art of concealing imperfections, it's time to release your creativity with vibrant color options that will turn your garage walls into a stunning focal point. With color psychology in mind, you can choose hues that evoke the desired emotions and atmosphere. For a budget-friendly option, consider painting a single accent wall in a bold, contrasting color to create a striking visual effect.
Here are some popular color schemes to get you started:
| Color Scheme | Emotional Response | Recommended Patterns |
|---|---|---|
| Calm Oasis | Serenity, relaxation | Soft greens, blues, and neutral tones with subtle texture |
| Industrial Chic | Energy, modernity | Exposed brick reds, industrial grays, and geometric patterns |
| Racing Stripe | Dynamism, excitement | Bold reds, yellows, and black accents with horizontal stripes |
When mixing patterns, remember to balance bold designs with neutral backgrounds to avoid visual overload. By choosing the right color scheme, you can create a garage that not only looks amazing but also reflects your personality.
DIY Shelving Units Saves Money
When you decide to create your own DIY shelving units, you'll be amazed at how much money you can save. By repurposing old materials, building to fit your specific garage needs, and maximizing your vertical space, you'll not only stay within budget but also create a customized storage solution that meets your unique requirements.
With a little creativity and some basic DIY skills, you can create a shelving system that's both functional and cost-effective.
Repurpose Old Materials
By repurposing old materials, you can create DIY shelving units that not only save you money but also add a touch of uniqueness to your garage renovation. You'll reduce waste and breathe new life into items that would otherwise end up in a landfill.
Consider salvage projects that transform discarded pallets, crates, or wooden planks into functional storage solutions. With a little creativity, you can turn old pipes into industrial-chic shelving or repurpose vintage windows as decorative storage units.
Resourceful redesigns like these not only save you money on materials but also add character to your garage. Get creative with old furniture pieces, like turning an outdated dresser into a storage cabinet or upcycling an old door into a shelving unit.
When repurposing old materials, remember to clean and refinish them to make sure they're sturdy and safe to use. With a little patience and imagination, you can create one-of-a-kind DIY shelving units that reflect your personal style and add a touch of personality to your garage renovation.
Build to Fit
You can maximize your garage's storage capacity and save money by building DIY shelving units that fit your space's unique dimensions and needs. This approach allows you to create custom storage solutions that cater to your specific requirements, rather than relying on generic, off-the-shelf products.
By building to fit, you can:
-
Optimize corner spaces with angled shelves or carousels that make the most of often-wasted areas.
-
Accommodate oversized items with bespoke shelving units that can handle bulky equipment or tools.
-
Incorporate adjustable shelves that can be easily reconfigured as your storage needs change over time.
- Add specialized features, such as built-in cabinets, drawers, or hooks, to create a tailored organization solution.
Maximize Vertical Space
Taking advantage of your garage's vertical space with DIY shelving units is a savvy way to increase storage capacity while keeping costs in check. By building your own shelving units, you can customize them to fit your specific storage needs, ensuring that every inch of space is utilized efficiently.
This is especially important in a garage, where clutter can quickly accumulate and make the space feel cramped. To maximize your vertical space, start by identifying the areas where you need the most storage. This might be above your workbench, along a wall, or in a corner.
Then, design your shelving units to fit those specific areas, using materials like plywood, MDF, or even reclaimed wood. Consider adding bins, baskets, or hooks to your shelves to create additional storage solutions and keep items organized.
With a little creativity and some basic DIY skills, you can create a functional and organized garage that makes the most of its vertical space. By doing so, you'll not only increase your storage capacity but also create a more streamlined and efficient workspace.
Upcycle Old Furniture Pieces
About 75% of old furniture pieces can be repurposed into functional and stylish elements in your garage renovation, saving you money and reducing waste.
You can breathe new life into old furniture by upcycling them into unique and functional pieces that add character to your garage. This eco-friendly approach to garage renovation not only reduces waste but also allows you to express your creativity.
Here are some creative ways to upcycle old furniture pieces:
-
Turn an old dresser into a storage bench: Add a cushion on top and some decorative hardware to create a one-of-a-kind storage bench.
-
Transform an old door into a workbench: Attach some wooden legs and a vice to create a functional workbench.
-
Upcycle an old pallet into a shelving unit: Add some wooden brackets and a coat of paint to create a rustic shelving unit.
- Convert an old bookshelf into a pegboard: Attach some pegs and hooks to create a functional pegboard for hanging tools and accessories.
Garage Flooring on a Shoestring
With a little creativity and resourcefulness, your garage floor can undergo a stunning transformation without breaking the bank. One budget-friendly option is to apply an epoxy coating, which not only protects the floor from stains and damage but also allows you to get creative with designs. You can add a pop of color, create a unique pattern, or even embed decorative flakes to give your garage floor a personalized touch.
Another cost-effective solution is to install rubber matting. Not only is it easy to install, but it's also a great way to add traction and comfort to your garage floor. Plus, rubber matting is resistant to oil, grease, and other chemicals, making it a practical choice for a garage. You can choose from a variety of styles, from simple and understated to bold and eye-catching.
With rubber matting, you can create a functional and stylish garage floor that fits your budget and meets your needs. By thinking outside the box and exploring these budget-friendly options, you can achieve a showroom-worthy garage floor without breaking the bank.
Brighten up With Affordable Lighting
How can you illuminate your garage without draining your wallet? The answer lies in exploring energy efficient lighting options that not only save you money but also reduce your carbon footprint. You can start by replacing traditional incandescent bulbs with LED or CFL bulbs, which consume considerably less energy and last longer.
When it comes to creative lighting fixtures, think beyond the standard overhead lighting. Here are some budget-friendly options to ponder:
-
String lights: Add a touch of industrial chic with string lights that can be hung from the ceiling or wrapped around beams.
-
Task lighting: Install under-cabinet lighting or pendant lights above workstations to create focused lighting.
-
Recessed lighting: Create a sleek, modern look with recessed lighting that can be installed in the ceiling.
- Shop lights: Use adjustable shop lights to direct light exactly where you need it.
Declutter Before You Renovate
Before you start hammering away, take a step back and purge your garage of all the unnecessary items that have accumulated over the years, as a clutter-free space is essential for a successful renovation. You'll be surprised at how much junk you've accumulated, from broken tools to old boxes. Take everything out, sort items into categories, and be ruthless – if you haven't used it in a year, it's probably safe to get rid of it.
Next, implement some organizing tips to keep your garage tidy. Invest in storage solutions like shelving units, bins, and hooks to keep items off the floor and out of the way. Consider a minimalist design that prioritizes a functional layout, making it easy to find what you need when you need it. This will also help you visualize your space and identify areas that need improvement.
Frequently Asked Questions
Can I Renovate My Garage on a Weekend?
You can tackle a weekend project, leveraging budget-friendly options to transform your garage. Focus on quick fixes and efficient solutions, like repurposing storage, swapping lighting, and revitalizing paint, to achieve a stunning makeover in just 48 hours.
How Do I Handle Garage Renovation Permits?
You'll need to navigate the permit process, considering the timeline and cost implications, as well as potential restrictions, to guarantee a smooth and compliant garage renovation, so plan ahead and budget accordingly.
What if I Have a Small or Narrow Garage?
Imagine steering through a packed ship's cabin; you're the captain, tasked with fitting all cargo snugly. Similarly, in your small or narrow garage, you'll master maximizing space by implementing creative storage solutions, like wall-mounted shelves and multi-tiered racks, to keep everything shipshape.
Can I Do Garage Renovation With No DIY Experience?
You can still achieve a garage renovation without DIY experience by hiring professionals or using garage renovation kits, which offer quick fixes and budget-friendly solutions, allowing you to outsource tasks and stay within your budget.
How Long Does a Garage Renovation Typically Take?
As you envision your garage's transformation, you're probably wondering how long it'll take. Typically, a garage renovation timeline spans 2-6 weeks, but you can tackle weekend garage projects in just a few days, depending on the scope of your vision.
Related Posts
-
Safeguarding Valuables: 7 Garage Storage Tips
To safeguard your valuables, begin by maintaining a stable garage environment with climate control and protection fro...
-

Why Large Musical Instruments Need Specialized Storage
You know your large musical instrument is a valuable asset that requires precise care and handling to preserve its be...
