7 Budget-Friendly Garage Organization Hacks
Share
You can transform your cluttered garage into a haven of organization with these 7 budget-friendly hacks. Repurpose old pallets into storage solutions, like shelves or crates, to add rustic charm. Utilize ceiling space with hooks to hang bikes, boards, and less-used items. DIY shelving units from recycled wood or create a magnetic spice strip to declutter your workspace. Label and categorize storage bins for easy access, and install a pegboard for tool organization. Maximize corner space with baskets, and get ready to take your garage organization to the next level - there are even more creative solutions waiting for you!
Key Takeaways
• Repurpose old pallets into shelves, crates, or bins for a budget-friendly and eco-friendly storage solution.
• Utilize vertical space by installing hooks, shelves, or baskets to maximize storage potential and free up floor space.
• Organize and label storage bins with clear, descriptive names and color-coding for easy identification and access.
• Mount a pegboard on a garage wall to customize tool organization and reduce tool loss and searching time.
• Transform a metal strip into a magnetic storage solution for small metal items, increasing efficiency and saving space.
Repurpose Old Pallets for Storage
You can breathe new life into old pallets by transforming them into versatile storage solutions that can help keep your garage organized and clutter-free. With a little creativity and some DIY inspiration, you can turn these discarded materials into functional and space-saving storage units.
Pallet projects are an excellent way to get creative with upcycled materials, and the best part is that they're often free or low-cost.
You can disassemble pallets and use the wood to build shelves, crates, or bins that can store everything from tools and equipment to sports gear and seasonal decorations. You can also leave the pallets intact and use them as is, adding casters or hooks to make them more functional.
The possibilities are endless, and the result is a unique and eco-friendly storage solution that adds character to your garage. By repurposing old pallets, you'll not only reduce waste but also create a more organized and efficient space that reflects your personal style.
Utilize Ceiling Space With Hooks
As you look for ways to maximize your garage's storage potential, don't forget to think vertically! You can free up a significant amount of floor space by utilizing the ceiling with hooks. It's a great opportunity to store items that you don't use frequently.
Hang Bikes and Boards
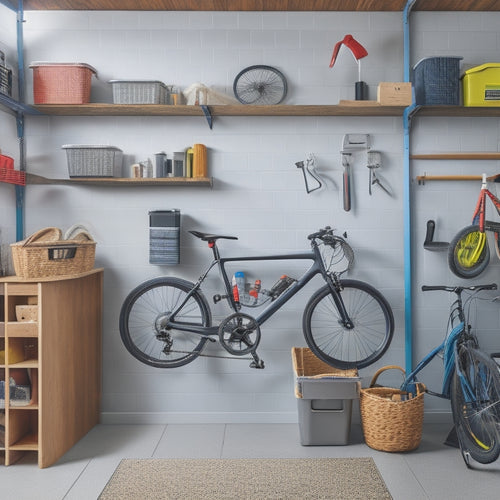
Ceiling-mounted hooks offer a convenient and space-saving solution for storing bicycles and boards, freeing up valuable floor space in your garage. By setting up hooks, you'll be able to store your bikes and boards in a secure and easily accessible manner, keeping them out of the way yet readily retrievable.
To optimize your garage's storage potential, consider the following:
-
Select the appropriate hook: Choose hooks that are specifically designed for the weight and type of bike or board you're storing. This ensures a secure hold and prevents damage to your gear.
-
Position hooks strategically: Place hooks near the door or in a corner to establish a dedicated storage area, keeping your floor clear and reducing clutter.
-
Combine with wall-mounted racks: Pair ceiling hooks with wall-mounted racks to create a complete storage system, ideal for storing helmets, accessories, and other gear.
Store Less-Used Items
By leveraging the often-underutilized space above, you can stash less-frequently used items, like seasonal decorations or out-of-season sports equipment, on hooks, keeping them out of the way while maintaining easy access. This is especially useful for items like camping gear, which you may only use a few times a year. By hanging them from the ceiling, you'll free up valuable floor and shelf space for more frequently used items.
Consider installing hooks or a storage rack near the ceiling to store holiday supplies, outdoor equipment, and other items that only see the light of day during specific times of the year. This will keep them organized, protected from dust and moisture, and out of the way of your daily activities. Plus, when you need them, they'll be easily accessible, saving you time and hassle.
DIY Shelving With Recycled Wood
You can breathe new life into discarded wood by repurposing it into functional and eco-friendly shelving units that not only declutter your garage but also add a touch of rustic charm to the space.
By getting creative with DIY shelving, you can create a unique storage solution that reflects your personal style.
Here are three ways to upcycle wood into garage shelving:
-
Painted pallets: Transform old pallets into colorful shelves by disassembling them, sanding, and painting them in bold hues. Attach them to your garage wall using screws or nails, and voilà! You've got a one-of-a-kind shelving unit.
-
Woodworking projects: If you're handy with a saw and drill, consider creating custom shelving units from reclaimed wood. You can design them to fit specific storage needs, like holding bins or baskets.
-
Repurposed crates: Salvage old crates and boxes to create rustic shelving units that add a touch of industrial chic to your garage. Simply clean, sand, and assemble them to create a functional storage solution.
Label and Categorize Storage Bins
Now that you've got your DIY shelving in place, it's time to tackle the next important step: labeling and categorizing your storage bins.
You'll want to make sure you've got the right labeling essentials, like a label maker and some sturdy labels, to get started.
Bin Labeling Essentials
Labeling your storage bins is essential to maintaining a clutter-free garage. It allows you to quickly identify what's inside and where it belongs. By doing so, you'll save time searching for specific items and prevent clutter from building up again.
To get started, you'll need a few essential tools:
-
A label maker: This will help you create clear, readable labels that will withstand the garage environment.
-
Color-coded labels: Use different colors to categorize your storage bins by type, such as tools, sports equipment, or seasonal decorations. This visual system will help you quickly identify where items belong.
-
Durable labels: Choose labels that can withstand the garage's temperature fluctuations and humidity.
Clear Category Names
With your labeling tools in hand, categorize your storage bins by assigning clear, descriptive names that reflect their contents, ensuring you can pinpoint what's inside at a glance. This step is vital in maintaining a clutter-free garage. By creating distinct categories, you'll be able to locate items quickly and effortlessly.
Here are some examples of clear category names and their corresponding contents:
| Category Name | Contents |
|---|---|
| Toolbox Essentials | Hammer, screwdrivers, pliers, wrenches |
| Seasonal Decorations | Holiday lights, decorations, and themed items |
| Upcycled Furniture Parts | Old furniture pieces for future DIY projects |
| Garage Shelving Supplies | Screws, brackets, and other shelving materials |
Install a Pegboard for Tools
Across one entire wall of your garage, you can mount a pegboard, providing a centralized hub for hanging and organizing your tools, accessories, and equipment. This simple yet effective solution boosts tool organization and garage efficiency, allowing you to quickly find what you need and get to work.
Here are three benefits of installing a pegboard:
-
Maximize vertical space: By utilizing your garage's vertical space, you'll free up floor and shelf space for other items, creating a more organized and clutter-free environment.
-
Customize your storage: With a pegboard, you can arrange hooks, bins, and other accessories to fit your specific tool storage needs, making it a DIY solution that's tailored to you.
-
Reduce tool loss: With everything hung neatly in its place, you'll reduce the likelihood of misplacing tools, saving you time and frustration.
Create a Magnetic Spice Strip
Transform a narrow strip of metal into a magnetic spice strip, perfect for corralling small metal items like screws, nuts, or bolts, and keep them within easy reach. You'll be surprised at how this simple hack can declutter your workspace and make your life easier.
Start by attaching strong magnets to the back of the metal strip, then mount it on a wall or the side of a cabinet. You can also add a magnetic calendar display or a DIY magnetic art wall to create a visually appealing and functional space.
This magnetic spice strip isn't only limited to storing small metal items. You can also use it to hold a magnetic knife holder or a magnetic photo display. The possibilities are endless!
With this hack, you'll be able to find what you need quickly, and you'll have more space to work on your projects. Plus, it's an affordable and easy DIY project that can be completed in no time.
Maximize Corner Space With Baskets
You can take your garage organization to the next level by utilizing the often-wasted corner spaces with cleverly placed baskets that keep clutter at bay and make the most of your storage capacity. By incorporating basket organization into your garage design, you'll be amazed at how much more functional and spacious your garage can become.
Here are three ways to maximize corner space with baskets:
-
Install corner shelves: Build or purchase corner shelves that fit snugly into the corner space, providing ample room for baskets to store items like tools, accessories, or cleaning supplies.
-
Hang baskets from the ceiling: Suspend baskets from the ceiling to take advantage of vertical storage and keep frequently used items within easy reach.
-
Use stackable baskets: Choose stackable baskets that can be easily arranged in corners to store items like seasonal decorations, out-of-season clothing, or other infrequently used items.
Related Posts
-

What to Do With Seasonal Decorations in Garage?
You've got a garage full of seasonal decorations, and it's time to get organized! Start by purging items you no longe...
-

Boost Productivity With Efficient Garage Storage Solutions
By optimizing your garage storage, you'll free up time and energy to focus on what matters. Start by evaluating your ...

