DIY Garage Makeover on a Small Scale
Share
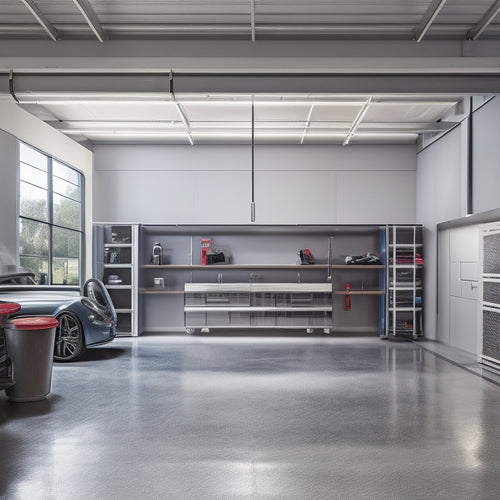
You're ready to transform your cluttered garage into a functional space that boosts your productivity and pride of ownership. Start by analyzing your space, identifying design priorities, and evaluating safety hazards. Then, purge and declutter by categorizing items, creating zones, and organizing with shelving solutions. Maximize wall storage with paint organization systems, mounted shelves, and DIY pegboards. Next, utilize ceiling storage options like overhead racks and hanging solutions. By following these steps, you'll be on your way to a visually appealing and functional garage - and with a few more adjustments, you'll reveal its full potential.
Key Takeaways
• Identify design priorities and assess space utilization to optimize garage flow and functionality on a small scale.
• Implement vertical storage solutions, such as shelves and pegboards, to maximize wall storage and keep floors clear.
• Create zones for keep, donate, sell, or discard items to efficiently purge and declutter the garage space.
• Utilize ceiling storage options, like overhead racks and DIY shelving, to store seasonal items and infrequently used tools.
• Designate a work zone station with a workbench, tool storage, and clear labeling to enhance functionality and efficiency.
Assessing Your Garage Space
Take inventory of your garage's current state by walking in and making a mental note of what's working and what's not. As you scan the space, think about how you want to use it. Do you need a dedicated area for hobbies or a spot for your kids' bikes? Identify your priorities to inform your design decisions.
Now, assess your garage's space utilization. Where are the bottlenecks? Are there any areas that feel cramped or wasted? Consider vertical storage solutions like shelves, hooks, or bins to maximize your ceiling height. Think about the flow of traffic and how you can create a more functional layout.
Conduct a functionality assessment to determine how well your garage is serving you. Are there areas that are difficult to access or cluttered? Are there any safety hazards? Make a list of what's not working and what you want to achieve in your garage makeover.
Purge and Declutter Process
You're ready to transform your garage, and it starts with clearing out the clutter.
Take everything out - yes, everything! - and sort items into categories, like 'keep,' 'donate,' and 'toss,' to get a clear picture of what you're working with.
Clear the Clutter Now
Clear the Clutter Now
Diving into the purge and declutter process, start by gathering boxes, trash bags, and a marker to categorize items into keep, donate, sell, and discard piles. This pivotal step sets the stage for a successful garage makeover. Begin by sorting items into categories, such as tools, sports equipment, and seasonal decorations.
| Category | Items to Keep | Items to Let Go |
|---|---|---|
| Tools | Functional, frequently used tools | Broken, outdated, or duplicate tools |
| Sports Equipment | Equipment in good condition, regularly used | Outgrown, broken, or unused equipment |
| Seasonal Decorations | Decorations in good condition, still enjoyed | Broken, outdated, or no longer enjoyed decorations |
| Storage Containers | Containers in good condition, still useful | Broken, rusty, or no longer useful containers |
| Miscellaneous | Items with sentimental value or still useful | Items with no sentimental value or no longer useful |
As you sort, ask yourself: 'When was the last time I used this item?' or 'Do I have a sentimental attachment to this item?' Be honest with yourself, and let go of items that no longer serve a purpose. This decluttering process will help you identify areas where you can implement storage solutions and DIY projects to maximize your garage space.
Organize Remaining Items
With your clutter-free zones established, now it's time to assign a home for each remaining item, ensuring everything has a designated place where it can be easily accessed and put back. This is where shelving solutions come in handy. You can install shelves or use storage bins to keep items off the floor and out of the way. Consider DIY projects that repurpose items you already have, like turning an old pallet into a shelving unit or using mason jars to store small items.
As you organize, think about the items you use most frequently and place them in easy-to-reach locations. Less frequently used items can be stored on higher or lower shelves. Make sure everything is labeled so you can quickly find what you need. This will save you time and frustration in the long run.
Optimize Your Wall Storage
Every available inch of wall space is an opportunity to maximize storage and keep your garage floor clear. By optimizing your wall storage, you'll create a more organized and functional space.
Start by utilizing paint organization systems, which can hold cans, brushes, and other painting supplies. Consider shelving solutions that can be mounted on the wall, providing additional storage for bins, baskets, and other items.
For a more customized approach, create your own DIY pegboards using a wooden board and hooks. Hang baskets or bins from the hooks to store small items like nuts, bolts, and screws. This will keep them off the floor and within easy reach.
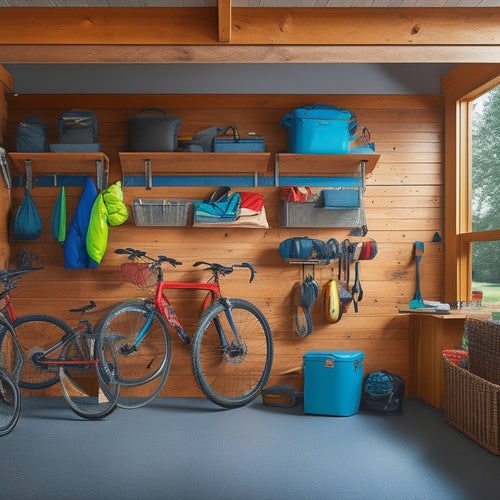
You can also add a hanging basket or two to store items like bike helmets, gloves, or other accessories. By taking advantage of your wall space, you'll be amazed at how much more organized and clutter-free your garage can be.
Utilize Ceiling Storage Options
When you're working with a small garage, every inch counts, and that includes the space above your head.
You're likely wasting valuable real estate by not utilizing your ceiling storage options, so it's time to think vertically and make the most of that overhead space.
Maximize Vertical Space
Take advantage of your garage's often-wasted ceiling space by installing overhead storage racks or bins to stash infrequently used items like seasonal decorations, out-of-season clothing, or luggage. This won't only free up floor space but also keep these items organized and out of the way.
To maximize vertical space, consider DIY shelving solutions that can be customized to fit your specific needs. You can install shelves, hooks, or bins to store items like bicycles, tools, or storage containers.
When choosing hanging solutions, think about the weight and size of the items you'll be storing. Look for sturdy and durable options that can support the weight of your belongings. Consider using adjustable shelving or bins with labels to make it easy to access and identify what's stored above.
Optimize Overhead Storage
To get the most out of your garage's overhead storage, start by evaluating what you need to store and where it makes sense to install bins, racks, or shelves to keep items within easy reach. Consider the items you use frequently, like seasonal decorations or out-of-season sports equipment, and plan your overhead storage accordingly.
When it comes to DIY storage solutions, get creative with space-saving hacks. Install overhead racks for bikes, kayaks, or other bulky items to free up floor space. Use adjustable shelving to accommodate different-sized bins and containers. You can also repurpose old pallets or crates to create unique storage units.
For a more polished look, add some garage organization systems like slatwall panels or hooks. These will help you maximize your overhead storage while keeping the area looking neat and organized.
Remember to always follow safety guidelines when installing overhead storage, and don't be afraid to think outside the box (or bin!) to come up with creative ideas that work best for your garage.
Create a Work Zone Station
Designate a specific area of your garage as a work zone station, where you can efficiently sort, organize, and complete tasks without clutter or distractions. This dedicated space will help you stay focused and productive, allowing you to tackle projects with ease.
To create an effective work zone, consider the following essential elements:
-
DIY workbench: Build or repurpose a workbench that provides ample space for your projects. Add a vice, clamps, and a measuring tape to make it a functional workspace.
-
Storage solutions: Install shelves, cabinets, or bins to store tools, materials, and supplies within easy reach. Label each storage unit to maintain organization and reduce waste time searching for items.
-
Tool organization: Use a pegboard or a tool organizer to hang frequently used tools, keeping them off the floor and out of the way. This will help you maintain a clutter-free workspace and prevent tripping hazards.
Designate Tool and Supply Areas
With your work zone station set up, now allocate specific areas within it for tools and supplies, ensuring everything has a designated home to maintain organization and maximize efficiency.
This is where tool organization and supply storage come into play. You'll want to create a functional layout that makes sense for your workflow and the types of projects you typically work on.
Designate zones for specific tools, such as a pegboard for hanging tools, a toolbox for storing smaller items, and a shelf for larger equipment. Consider the frequency of use and the size of each tool when deciding where to place them.
You may also want to create a separate area for supplies, like bins for storing nuts and bolts, or a cabinet for chemicals and paints. By assigning a home for each item, you'll reduce clutter and make it easier to find what you need when you need it.
This thoughtful planning will save you time and frustration in the long run, allowing you to focus on the project at hand.
Implement a Labeling System
By assigning clear labels to each zone, bin, and shelf, you'll create a visual language that helps you and others quickly identify where items belong, making it easier to maintain your newly organized garage. This labeling system will become the backbone of your garage's organization, ensuring that everything has a designated home and reducing clutter.
Here are some labeling benefits and creative solutions to contemplate:
-
Color-code labels: Use different colors to categorize items, such as red for tools, blue for sports equipment, and green for gardening supplies.
-
Use descriptive labels: Instead of just labeling a bin 'Miscellaneous,' try 'Electrical Components' or 'Fasteners and Adhesives' to make it easier to find what you need.
-
Add icons and images: Incorporate simple icons or images to help visually identify the contents of a bin or shelf, especially for items that are harder to describe with words.
Add Finishing Touches Easily
Now that your garage's organization is taking shape, it's time to put the finishing touches in place, and you'll be amazed at how these small details can elevate the overall functionality and aesthetic of your space.
Add a few DIY decor ideas to give your garage a personal touch. For instance, hang some bike helmets or vintage signs on the walls to add visual interest.
You can also add some plants or a small rug to create a cozy atmosphere.
Quick upgrades can also make a big impact. Replace the lighting fixtures with brighter, more energy-efficient options.
Update the hardware on your cabinets or add some decorative trim to give them a fresh look.
Don't forget about the floors - a fresh coat of epoxy or a new mat can make a huge difference.
Related Posts
-

Top Garage Shelving Units for a Dream Garage
You're just a few smart shelving decisions away from transforming your cluttered garage into a well-organized haven w...
-

Maximizing Garage Space for Outdoor Gear Storage
You're struggling to find space for your outdoor gear in your cluttered garage. To maximize storage, start by evaluat...

